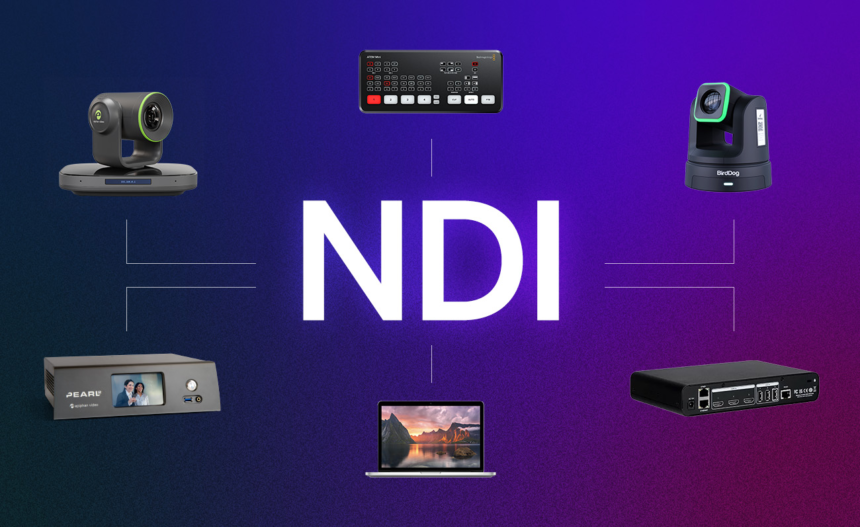
Network Device Interface (NDI) is a video transmission protocol developed by NewTek that fundamentally changed how video professionals work. Introduced publicly in 2016 and refined through versions 3.x and 4.0, NDI enables high-quality, low-latency video transmission over standard Ethernet networks—replacing dedicated video cables with network infrastructure. The NFL uses NDI to manage dozens of camera feeds during live broadcasts. Corporate conference rooms use it to seamlessly blend remote and in-studio participants. Home content creators use it to build professional-grade multi-camera setups from compact cameras and computers.
The problem NDI solves is simple but critical: professional video production has relied on expensive, inflexible infrastructure. HDMI cables work for 30 feet maximum. SDI cables require dedicated broadcast-grade infrastructure costing thousands. USB connections limit you to single devices. None of these solutions scale when you need multiple video sources, remote operators, or network-based flexibility. NDI asks a radical question: what if video just flowed over the network like any other data?
At its core, NDI enables video, audio, metadata, and control data to travel simultaneously over a single Ethernet connection with latency measured in milliseconds, not seconds. It supports multiple bandwidth modes (full quality at ~100 Mbps or efficient NDI-HX at 8-20 Mbps), automatic device discovery, bidirectional control, and integration with professional streaming software like vMix, OBS, and Wirecast. For anyone serious about streaming or live production, understanding NDI is non-negotiable.
What exactly is NDI?
NDI stands for Network Device Interface. It’s a software protocol (a set of technical rules) that tells video equipment how to talk to each other over computer networks.
Think of it this way: HDMI is like a dedicated telephone line between two people. SDI is like a more robust phone line designed for long distances. NDI is like email—the message (your video) gets encoded as digital data, sent through existing internet infrastructure, and decoded on the receiving end.
The key difference: NDI treats video like network data rather than analog signals that need physical cables. This seemingly small shift enables massive workflow changes.
Official definition from NewTek:
“NDI is a specification that allows multimedia systems to identify and communicate with one another over IP and to encode, transmit, and receive high-quality, low latency, frame-accurate video and audio, and exchange metadata in real-time.”
How NDI technically works
The transmission path
When you connect an NDI camera to your network:
- Encoding: The camera’s processor converts video into digital data using the NDI codec
- Network transmission: Data travels over Ethernet (standard network cables) to your switch/router
- Discovery: The camera announces itself on the network using mDNS (multicast DNS), like a printer does when you scan for available devices
- Reception: Receiving devices (computers, switchers, monitors) automatically detect the camera and can request the video stream
- Decoding: The receiving device decodes the data back into viewable video
- Feedback: The camera receives “tally” information telling it whether it’s on-air or in preview, and receives control commands (pan, tilt, zoom)
All of this happens nearly simultaneously—typically with latency under 1 millisecond, compared to 5-10 milliseconds for USB and 100+ milliseconds for internet streaming.
Protocol specifications
Video formats:
- Full NDI: 1080i/p, 4K resolution at various frame rates
- NDI-HX: High-efficiency version using H.264 compression for lower bandwidth
- NDI-HX3: Latest version balancing quality and bandwidth efficiency
Bitrate requirements:
- Full NDI: ~100 Mbps for 1080p, ~250 Mbps for 4K
- NDI-HX: 8-20 Mbps for 1080p
- NDI-HX3: 1-50 Mbps depending on quality settings
Key technical advantages over alternatives:
- Automatic discovery: Cameras show up on your network instantly without manual IP configuration
- Bidirectional metadata: Camera and control software exchange information in both directions
- Tally signals: Cameras know when they’re “on air” and can illuminate indicators on camera bodies
- Frame-accurate switching: Video transitions are perfectly synchronized to the frame level
- Multiple simultaneous streams: One camera can send video to dozens of receivers simultaneously
NDI vs USB vs HDMI vs SDI
These are the four main video transmission standards in production environments. Each solves different problems:
| Aspect | USB | HDMI | SDI | NDI |
|---|---|---|---|---|
| Type of connection | Physical cable (data) | Physical cable (signal) | Physical cable (broadcast signal) | Network (ethernet) |
| Max distance | 5 meters | 30 meters | 300+ meters (with expensive fiber) | Network range (100+ meters) |
| Setup complexity | Plug and play | Plug and play | Professional setup required | Network setup |
| Cost | Cheap cables | Moderate cost | Expensive infrastructure | Network equipment |
| Quality (1080p) | Good | Excellent | Excellent | Excellent |
| Latency | 5-10ms | 5-10ms | 1ms | <1ms |
| Multiple sources on one cable | No (one per port) | No (one per cable) | No (one per cable) | Yes (multiple on one network) |
| Remote control | Limited | No | No | Yes (bidirectional) |
| Automatic discovery | No | No | No | Yes |
| Industry use | Consumer webcams | Consumer/prosumer | Broadcast studios | Modern production |
| Scalability | Poor (limited USB ports) | Poor (limited ports) | Complex | Excellent (network-based) |
Real-world comparison:
USB scenario: You have a webcam connected to your computer. If you want to add a second camera, you need a second USB port. If you want a third camera, you need a USB hub. For 10 cameras? Impractical.
HDMI scenario: Your camera connects directly to a monitor. Maximum cable distance is 30 meters. If you want another camera at the same monitor, you need an HDMI switcher (additional device). For routing video through a production network? Not designed for that.
SDI scenario: Professional broadcast standard. Cameras connect to a switcher via dedicated SDI cables. Quality is exceptional. But infrastructure costs $10,000+, requires certified installers, and is inflexible if you need to move equipment.
NDI scenario: Camera connects to your existing network via Ethernet. Automatically discovers all receiving devices. Your computer running OBS sees it instantly. You can add 10 cameras and they all work simultaneously. Switch between any camera with software. Costs less than SDI infrastructure.
Why NDI is revolutionary for content creators and broadcasters
Problem 1: Cable complexity
Before NDI:
A modest production setup might require:
- USB cables from cameras to computers (5 meters max, often not enough)
- HDMI cables from cameras to monitors (30 meters max, expensive fiber optic for longer runs)
- Separate audio cables
- Separate control cables
- Power cables
- Total: 6-8 different cable types, hard to manage, expensive
After NDI:
- One Ethernet cable from camera to network switch
- Everything else (video, audio, control, metadata) travels over that single cable
- Total: 1 cable type, clean installation, scalable
Problem 2: Single-source limitation
Before NDI, equipment was fundamentally limited: one output connected to one input. If you wanted video on two monitors simultaneously, you needed expensive distribution amplifiers. If three monitors? More hardware.
NDI enables one source to send video to unlimited destinations simultaneously. One camera can feed:
- Live switcher for mixing
- Local recording computer
- Streaming platform upload
- Monitor display
- Remote backup recording
- All at the same time, over one connection.
Problem 3: Operator complexity
Traditional broadcast requires dedicated operators for each camera. One person controls camera 1’s pan/tilt/zoom. Another operates camera 2. A third operates camera 3. For small productions (podcasts, church streams, corporate events), hiring three operators is cost-prohibitive.
NDI enables one operator to control multiple cameras from a single software interface. Using vMix or OBS, one person can:
- Switch between camera angles
- Control zoom on each camera independently
- Manage audio levels
- Record multiple formats simultaneously
- All from one workstation
Problem 4: Remote production barriers
Connecting contributors from remote locations required either:
- Expensive satellite or fiber optic uplinks
- Flying equipment to remote sites
- Professional remote production teams
- Costs: $5,000-$50,000+ per remote connection
NDI allows remote participants to contribute directly via standard internet. A presenter in Mumbai can send their NDI camera feed to a studio in New York, and it integrates seamlessly into the broadcast.
Problem 5: Scalability limitations
Adding one more camera to an HDMI/SDI setup meant:
- New cables
- New switcher ports (expensive upgrade)
- Potential infrastructure replacement
- Time and installation costs
Adding a camera to an NDI network means:
- Plug it into the network
- Done (automatic discovery handles the rest)
- Scale to 100 cameras on the same network without hardware changes
Real-world use cases where NDI transforms workflows
Use case 1: Multi-camera home stream
Scenario: A gaming streamer wants three camera angles—full body, face close-up, and screen capture.
Without NDI:
- Three USB webcams (limited by USB port availability)
- OBS can only use one camera natively; others require virtual camera workarounds
- Different quality levels
- No unified control
- Complex setup, reliability issues
With NDI:
- Three NDI cameras on the network
- OBS sees all three automatically
- Switch between cameras with one click during stream
- Unified quality settings
- Single operator control
- Cost-effective with compact cameras like OBSBOT Tail Air
Use case 2: Corporate conference room
Scenario: Board meeting with 5 speakers and 2 remote participants.
Without NDI:
- 5 cameras in conference room, each connected to different cables
- 2 remote participants via Zoom video (poor integration)
- Switcher operator or multiple computer screens
- Audio mixing nightmare (separate system)
- Difficult to record all perspectives
With NDI:
- 5 NDI cameras on network, controlled centrally via vMix
- Remote participants feed into vMix via NDI-enabled Zoom
- One operator controls all cameras from single workstation
- Audio routed through same NDI infrastructure
- Multi-track recording captures all perspectives simultaneously
Use case 3: Live event coverage
Scenario: Sports event with 10 camera angles that need to feed to YouTube Live, local broadcast, and stadium scoreboard simultaneously.
Without NDI:
- 10 camera cables to central broadcast truck
- Professional SDI infrastructure ($50,000+)
- Dedicated satellite uplink for YouTube
- Separate system for scoreboard
- Multiple operators
- Complex troubleshooting when something breaks
With NDI:
- 10 NDI cameras on wireless mesh network
- All cameras automatically discovered in central production software
- vMix routes feeds to YouTube, local broadcast, and scoreboard from single interface
- One operator manages everything
- Wireless means less cable infrastructure to install/remove
- Cost: ~$25,000 vs $50,000+
Use case 4: Remote streaming from home
Scenario: Freelance videographer streaming from home office.
Without NDI:
- One USB webcam
- Static angle
- Poor upgrade path (replacing camera requires new USB setup)
- Limited professional integration
With NDI:
- Compact NDI camera (like OBSBOT Tail Air)
- Multiple angle options via motorized gimbal
- Integrates with professional OBS plugins
- Scalable—add cameras later without workflow changes
- Remote control via phone app
- Automatic AI tracking
Use case 5: TV broadcast production
Scenario: Live news production with 8 cameras, graphics team, remote reporter, and multiple output feeds.
Without NDI:
- Dedicated broadcast control room infrastructure
- Cost: $100,000+ equipment investment
- Requires professional broadcast-grade equipment
- Inflexible to location changes
With NDI:
- Mix of professional and prosumer NDI cameras
- Graphics computers with NDI output
- Remote reporter contributing via Zoom + NDI
- vMix manages all inputs from central computer
- Output simultaneously to broadcast satellite, YouTube Live, local stations
- Equipment cost: ~$30,000 (scalable based on budget)
- Flexible for remote productions or studio moves
Setting up NDI: What you actually need
Hardware requirements
Minimum setup:
- One NDI camera (or device with NDI output)
- Network switch (gigabit recommended, $50-200)
- Ethernet cables (standard Cat5e or Cat6, $10-20)
- Computer running receiving software (any Mac, Windows, Linux with gigabit network)
- Internet connection: Minimum 100 Mbps local network, gigabit (1000 Mbps) recommended for multiple streams
Professional setup:
- Multiple NDI cameras
- Managed network switch (allows VLAN isolation for separate production networks)
- Backup router/network redundancy
- PoE (Power over Ethernet) injector for cameras (powers camera through Ethernet cable)
- Dedicated production network separate from corporate WiFi
Software requirements
Receiving/switching software (all support NDI):
- vMix (professional): $500-5000 depending on tier. Industry-standard for broadcast production.
- OBS Studio (free): Add NDI plugin (free) to use NDI cameras. Perfect for streamers.
- Wirecast (professional): $500-1000. Alternative to vMix.
- Zoom/Teams: Built-in NDI support in newer versions; enables remote contributor workflows.
- Adobe Premiere/Final Cut: Some versions support NDI plugins for direct import.
Camera software:
- Most NDI cameras include mobile apps for control/preview (usually free)
- Desktop software for advanced settings (usually free, sometimes paid)
Network configuration (the tricky part)
Most NDI cameras and software use automatic discovery (mDNS/Bonjour), meaning:
However, automatic discovery only works on the same local network (same WiFi or switch). If you need:
- Remote production (camera in one city, control room in another)
- Multiple subnet networks
- Secure broadcast networks
You’ll need NDI Discovery Server (advanced setup) or NDI Access (manual IP configuration).
Most home and small-studio users never need this complexity. Plug in, auto-discover, stream.
NDI versions: What’s the difference?
NDI (Full)
- Highest quality, lowest compression
- ~100 Mbps for 1080p, ~250 Mbps for 4K
- Uncompressed audio, lossless video
- Requires robust network
- Industry standard for broadcast
NDI-HX (High Efficiency)
- H.264 compression for lower bandwidth
- 8-20 Mbps for 1080p
- Designed for WiFi and less robust networks
- Slight quality reduction vs full NDI
- Good for remote locations
NDI-HX3 (Latest)
- Improvement on HX with better quality-to-bandwidth ratio
- 1-50 Mbps depending on settings
- Same quality as full NDI but uses less bandwidth
- Recommended for new camera purchases
- Backward compatible with older NDI systems
Choosing which version:
- Local network with gigabit switches? Use full NDI
- WiFi or constrained bandwidth? Use NDI-HX or NDI-HX3
- New camera purchase? Choose NDI-HX3 (future-proof)
- Old existing system? Check what your software supports
Most cameras support multiple versions simultaneously, so compatibility isn’t usually a problem.
Advantages of NDI for different user types
For solo streamers
Why NDI matters:
- Use multiple cameras from single computer without complex setups
- Compact cameras (like OBSBOT Tail Air) with motorized gimbal enable multi-angle production
- Professional software integration (OBS plugins) without expensive hardware
- Automatic AI tracking means no second operator needed
Real benefit: Produce broadcast-quality solo streams that used to require 2-3 person crews.
For small production companies
Why NDI matters:
- Reduce equipment investment by 70% vs traditional broadcast setup
- Scale from 3 cameras to 30 cameras without replacing infrastructure
- Flexible remote production workflows
- Staff one operator instead of multiple camera ops
Real benefit: Compete with larger studios despite smaller budget.
For corporate AV integrators
Why NDI matters:
- Simplify conference room upgrades (replaces dedicated video infrastructure)
- Enable future scaling without complete redesign
- Support hybrid in-person + remote workflows
- Reduce cable clutter (aesthetic improvement)
Real benefit: Sell upgrade path for existing customer infrastructure.
For broadcasters
Why NDI matters:
- Reduce truck costs by moving to IP-based workflows
- Enable remote broadcast production from anywhere
- Better disaster recovery (reroute feeds instantly)
- Faster deployment to breaking news locations
Real benefit: NBC, Fox, and major broadcasters already use NDI for distributed production.
Limitations and when NOT to use NDI
Network dependency
NDI requires a reliable network. If your WiFi drops, streams fail. This is different from physical cables, which either work or don’t (no middle ground).
Solution: Use wired Ethernet for critical productions, even if wireless is available.
Bandwidth planning
NDI streams consume network bandwidth. One 1080p NDI stream uses ~100 Mbps. If that stream goes to three destinations, that’s 300 Mbps total. Gigabit networks can handle ~900 Mbps usable, so you can comfortably do 8-9 simultaneous 1080p streams.
Solution: Use NDI-HX for lower bandwidth requirements, or plan network upgrades for large productions.
Latency in wide-area networks
NDI achieves <1ms latency locally. If video travels across the internet to another city, latency jumps to 50-200ms (depending on distance and routing).
Solution: NDI is optimized for local area networks (LANs). For wide-area, use alternative protocols like SRT.
Complexity for non-technical users
Setting up automatic discovery is easy. Troubleshooting network issues is not. If your IT infrastructure is unreliable, NDI will expose those problems.
Solution: Have network support available for critical productions.
Cost for single-camera workflows
If you’re using just one camera and have no plans to scale, NDI adds complexity without benefit. A simple USB webcam is cheaper and easier.
Solution: NDI makes sense at 2+ cameras or when integrating with professional software.
The future of NDI
As of January 2026, NDI adoption is accelerating:
Professional adoption:
- Major broadcasters (NBC, Fox, BBC) use NDI for distributed production
- Enterprise video conferences increasingly support NDI
- Streaming platforms (YouTube, Twitch) have NDI integration considerations
Hardware expansion:
- Camera manufacturers (Panasonic, Sony, Canon) now include NDI in prosumer and broadcast gear
- Small cameras like OBSBOT Tail Air democratizing professional workflows
- Smartphones gaining NDI capability via apps
Software ecosystem:
- OBS, vMix, Wirecast, and Zoom all actively develop NDI features
- Adobe and Apple adding NDI support to creative tools
- More prosumer software including NDI as standard feature
Challenges ahead:
- Security protocols still evolving (NDI broadcast is relatively open)
- Standardization with competing protocols (SMPTE 2110, ASPEN)
- Training and adoption lag for traditional broadcast professionals
How to use NDI: Step-by-step for beginners
Setup for home streaming (OBS + OBSBOT Tail Air example)
Step 1: Hardware setup
- Connect OBSBOT Tail Air to your local WiFi network
- Make sure your computer is on the same WiFi network
- Ensure your network has minimum 100 Mbps bandwidth (check with speedtest.net)
Step 2: Install OBS
- Download OBS Studio (free) from obsproject.com
- Install on your computer
Step 3: Add NDI plugin to OBS
- Download OBS NDI plugin from GitHub (free)
- Install per plugin instructions
- Restart OBS
Step 4: Add NDI source
- Open OBS
- Click “Add Source” → “NDI Source”
- Select your OBSBOT Tail Air from the dropdown list
- It appears automatically (auto-discovery)
Step 5: Start streaming
- Configure output quality (bitrate, resolution)
- Click “Start Streaming”
- Video from Tail Air flows into OBS, streams to YouTube/Twitch
- Switch between multiple NDI cameras by creating multiple sources
Total setup time: 10-15 minutes
Setup for professional production (vMix + 3 cameras)
Step 1: Network infrastructure
- Install managed gigabit switch
- Connect all 3 cameras to switch via Ethernet
- Connect production computer to switch
- Verify gigabit speeds (not WiFi)
Step 2: Software
- Install vMix (trial or paid license)
- Open vMix
Step 3: Add cameras
- vMix automatically discovers all 3 NDI cameras
- Drag each into separate preview windows
- vMix shows live preview of all cameras
Step 4: Configure outputs
- Set primary output to YouTube Live endpoint
- Set backup recording to local disk
- Configure monitor output
- Set audio mixing priorities
Step 5: Production
- Operator switches between cameras during live event
- vMix records all simultaneously
- Multi-track recording enables post-production mixing
Conclusion
NDI transforms video production from a hardware-constrained workflow to a software-defined system. Instead of building studios around equipment, you build workflows around software. This shift enables:
- Solo creators to produce broadcast-quality content
- Small studios to compete with major productions
- Remote teams to collaborate seamlessly
- Scalable infrastructure that grows without redesign
The protocol is no longer emerging technology—it’s standard infrastructure for anyone serious about streaming or video production.
Whether you’re a Twitch streamer wanting multi-camera production, a corporate AV manager standardizing conference rooms, or a broadcast engineer designing remote production workflows, NDI is likely the foundation of your video future.
The cables are still there (Ethernet), but what matters now is the intelligence flowing through them.