Apple TV has evolved from a simple streaming box into a powerful, central hub for your entertainment ecosystem. Yet most users touch only a small fraction of what it can do. This guide will walk you through the Apple TV interface step by step, so you can navigate faster, find better content, and use features you probably didn’t know existed.
Getting Started: Remote, Home Screen, and Basic Navigation
Your main way of interacting with Apple TV is the Siri Remote. Depending on the generation you own, it may have a touch-sensitive surface or a clickpad, but the basics are the same:
- Swipe or click up, down, left, and right to move around the interface.
- Press the center to select.
- Press the Back button to go up a level or exit content.
- Press and hold the Siri button to issue voice commands.
If you find the touch surface too sensitive or annoying, you can change how it behaves. On Apple TV, go to Settings → Remotes and Devices → ClickPad / Touch Surface and choose between “Click and Touch” (gesture + button control) or “Click Only” to disable swipe-style navigation.
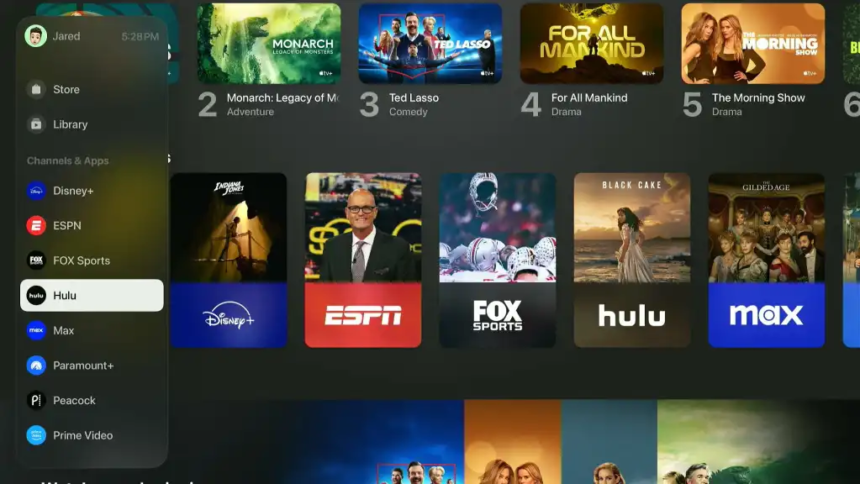
The Home screen is your starting point every time you power on the device. It shows a grid of apps, and at the top you’ll see the “Top Shelf” row that can show previews or quick-access content from selected apps. Learning to organize this screen is the first step to mastering the interface.
Organizing Apps and Creating Folders
If you install a lot of apps and streaming services, your Home screen can quickly become cluttered. Apple TV lets you arrange apps and group them into folders, similar to iPhone or iPad.
To move an app:
- Highlight an app on the Home screen.
- Press and hold the touch surface or clickpad center until the icon starts wiggling.
- Use the remote to move the app to a new position.
- Press the center again to drop it.
To create a folder:
- Enter “wiggle mode” as above by pressing and holding on an app.
- Move the app on top of another app and release.
- Apple TV will automatically create a folder and suggest a name based on the app types (for example, “Entertainment” or “Games”).
You can rename the folder:
- Highlight the folder and press and hold to enter edit mode.
- Swipe up to select the folder name.
- Use the on-screen keyboard or dictation (hold the Siri button and speak the name) to rename it.
Organizing apps into folders like “Streaming”, “Music”, and “Games” keeps your Home screen clean and makes launching your favorite services much faster.
To delete an app:
- Press and hold on the app until it wiggles.
- Press the Play/Pause or Menu options button (depending on remote version).
- Choose “Delete App”.
This is useful for removing services you no longer use and decluttering the interface.
Using Your iPhone as a Remote
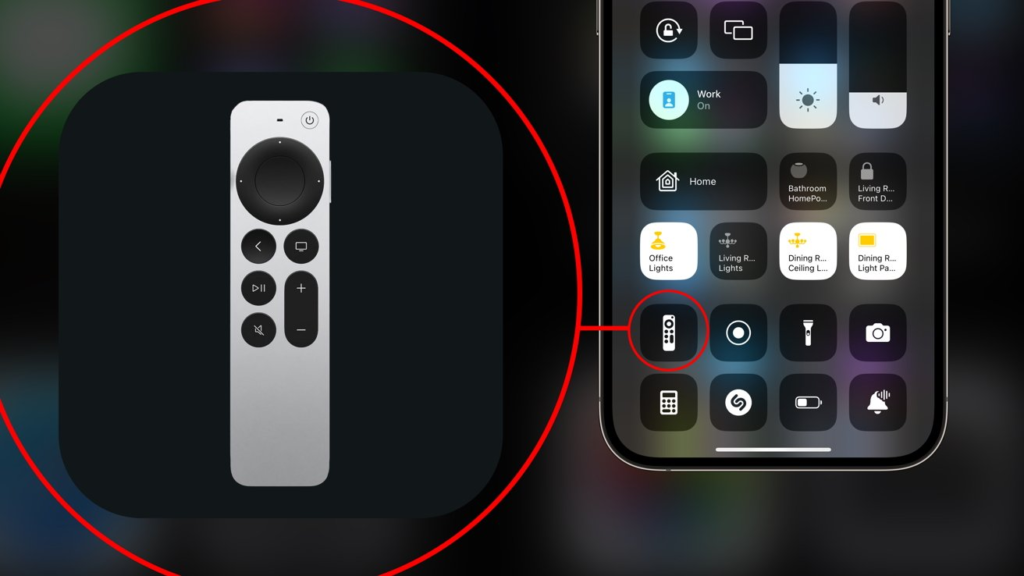
If you have an iPhone with the latest software and it’s on the same Wi‑Fi network, you can control Apple TV right from Control Center.
On your iPhone:
- Open Settings → Control Center.
- Make sure the “Apple TV Remote” control is added.
- Swipe down from the top-right corner (or up from the bottom edge on older models) to open Control Center.
- Tap the Apple TV Remote icon and choose your Apple TV.
Your iPhone screen becomes a touchpad with buttons, and you can type search queries and passwords using the iPhone keyboard instead of the on-screen keyboard. This is one of the easiest ways to speed up input and navigation.
Customizing the Home Screen Experience
The Home screen on Apple TV isn’t just a static grid — it can be tuned to your habits.
Key tips:
- Place your most-used apps in the top row. Many apps (like Apple TV, Netflix, Disney+, etc.) show extra previews or continue-watching content in the Top Shelf when they’re in the first row.
- Use folders for rarely used but “nice-to-have” apps, so the main area is reserved for daily services.
- If you share Apple TV with family, consider enabling separate user profiles so everyone gets personalized recommendations and Up Next lists.
You can switch users by holding the Home button (or TV-shaped button), then choosing the profile from the Control Center panel.
Mastering Search with Siri and Universal Search
One of Apple TV’s most powerful interface features is Siri-based universal search. Instead of opening each app to look for content, you can ask Apple TV across multiple services at once.
You can:
- Search by title: “Find Squid Game.”
- Search by actor: “Movies starring Margot Robbie.”
- Search by director: “Movies directed by Guy Ritchie.”
- Search by genre: “Horror movies from this year” or “Comedies from the 1980s.”
- Search by platform: “Action movies on Disney+” or “Crime dramas on BBC iPlayer.”
- Ask for suggestions: “What should I watch?” or “Top movies from 2022.”
Activate Siri by pressing and holding the Siri button on the remote and speaking your request. Results typically show:
- Where the title is available (e.g., Apple TV+, Netflix, Prime Video, regional services).
- Whether it’s included with your subscriptions or requires purchase/rental.
From the search results, you can directly open the title in the app of your choice, instead of guessing which service has it.
Building and Managing Your Watch List (Up Next)
Apple TV’s “Up Next” (or “Watch Now”) section acts as a combined watch list that can pull in shows and movies from multiple apps that integrate with Apple’s TV app.
When you find a show you want to watch later:
- Open the title’s detail page from search or inside the TV app.
- Select “Add to Up Next” or a similar option like “Add to Watchlist” that syncs with Apple TV.
This adds the title to the Watch Now / Up Next row in the TV app, so you can quickly resume or start it later, regardless of which app it technically lives in. For example, a BBC iPlayer drama, a Disney+ series, and an Apple TV+ exclusive can all appear in a single Up Next queue.
This is far more efficient than maintaining separate “My List” or “Watchlist” queues inside each streaming app.
Exploring the Apple TV App, Store, and Library
Apple TV’s main TV app can be confusing at first because it combines:
- Your personal Library (purchased or rented content).
- The Store (where you can buy or rent movies and TV shows).
- The Apple TV+ subscription service.
- Interface hooks into other streaming services.
At the top of the TV app, you’ll typically see sections like:
- Watch Now / Up Next: Your personal watch list from multiple apps.
- Apple TV+: Apple’s own original movies and series (requires a subscription).
- Store / Movies / TV Shows: Areas to rent or buy individual titles.
- Library: Content you’ve purchased or rented in the past (for example, from iTunes).
If you used to buy or rent via iTunes, your existing library is accessible in the Library tab. New purchases and rentals now happen through the Store. Even if you primarily stream today, it’s useful to know that your paid collection still lives in this interface.
Installing and Managing Streaming Apps
To turn Apple TV into your curated streaming hub, you’ll need to add the services you use:
- Open the App Store app on Apple TV.
- Use Siri, categories, or manual search to find apps like Netflix, Disney+, Prime Video, regional services, or niche streaming apps.
- Select “Get” or the download icon to install.
You can also use Siri from the Home screen to search for apps directly. If Apple TV recognizes you’re looking for an app (for example, “Disney Plus”), it can take you straight to the App Store listing if it isn’t already installed.
After installing, open each app and sign in. If your iPhone is on the same network, many apps support easy login via QR codes or automatic recognition, saving you from typing long usernames and passwords with the remote.
Watching Live TV and Channels
If you use apps that support live TV (for example, broadcaster apps or cable replacements), Siri can help here too. You can say things like:
- “BBC One live.”
- “Show me live channels.”
When supported, Apple TV will jump directly into the live stream of that channel within the appropriate app. This is especially useful if you prefer a traditional TV experience but want the modern interface and search of Apple TV.
Fine-Tuning Playback: Subtitles, Audio, and Volume
While watching a video, you aren’t limited to simple play/pause. Apple TV offers a set of powerful quick controls.
Using Siri during playback, you can say:
- “What did he say?” — rewinds 10 seconds and briefly shows subtitles.
- “Fast forward 20 minutes.”
- “Play this from the beginning.”
Using the remote:
- Swipe or click up during playback to reveal info and options.
- Tap the speech bubble icon to control subtitles and closed captions.
- Change the audio track if multiple languages are available.
- Enable “Reduce Loud Sounds” to compress audio dynamics, helpful for late-night viewing when you want dialog clear but explosions quieter.
This level of control makes watching more comfortable, especially if you frequently watch foreign-language content or in a shared household.
Advanced Tips and Quality-of-Life Tweaks
Once you’re comfortable with the basics, a few advanced tricks help you truly master the interface:
- Adjust the touch sensitivity or disable touch-only navigation in Settings → Remotes and Devices, if you often swipe too far.
- Use folders to separate “family” apps from your personal ones, then pair that with user profiles so recommendations stay relevant.
- Periodically delete unused apps to free space and simplify the Home screen.
- Explore app-specific Top Shelf behavior by moving apps to the top row and seeing how their previews or “continue watching” content changes.
If you ever feel lost, remember that the Back button and the Home (TV) button are your safety net: one takes you up one level, the other returns you to the Home screen or TV app depending on your configuration.
Conclusion
Apple TV is far more than an “overpriced streaming box.” With thoughtful use of the remote, Siri, folders, the TV app, and your watch list, it becomes a powerful, unified control center for all your streaming services. Spend a little time organizing apps, mastering search, and tuning playback controls, and the interface will start working for you instead of against you — making it easier to watch exactly what you want, when you want it, with minimal friction.